📁 Projects
Create, configure, and manage the projects that organize your defect tracking, feedback collection, and error monitoring workflows.
🌟 Overview#
A project in Sniffer is the central workspace for tracking bugs, collecting feedback, and monitoring errors. Each project has its own 📋 Task Board, 💬 Feedback pipeline, 📡 Live Logs, 🔗 Integrations, and team roster. You can create separate projects for different products, teams, or clients.
Projects are created using a guided onboarding wizard and appear on your Projects Dashboard where you can access, edit, archive, or delete them.
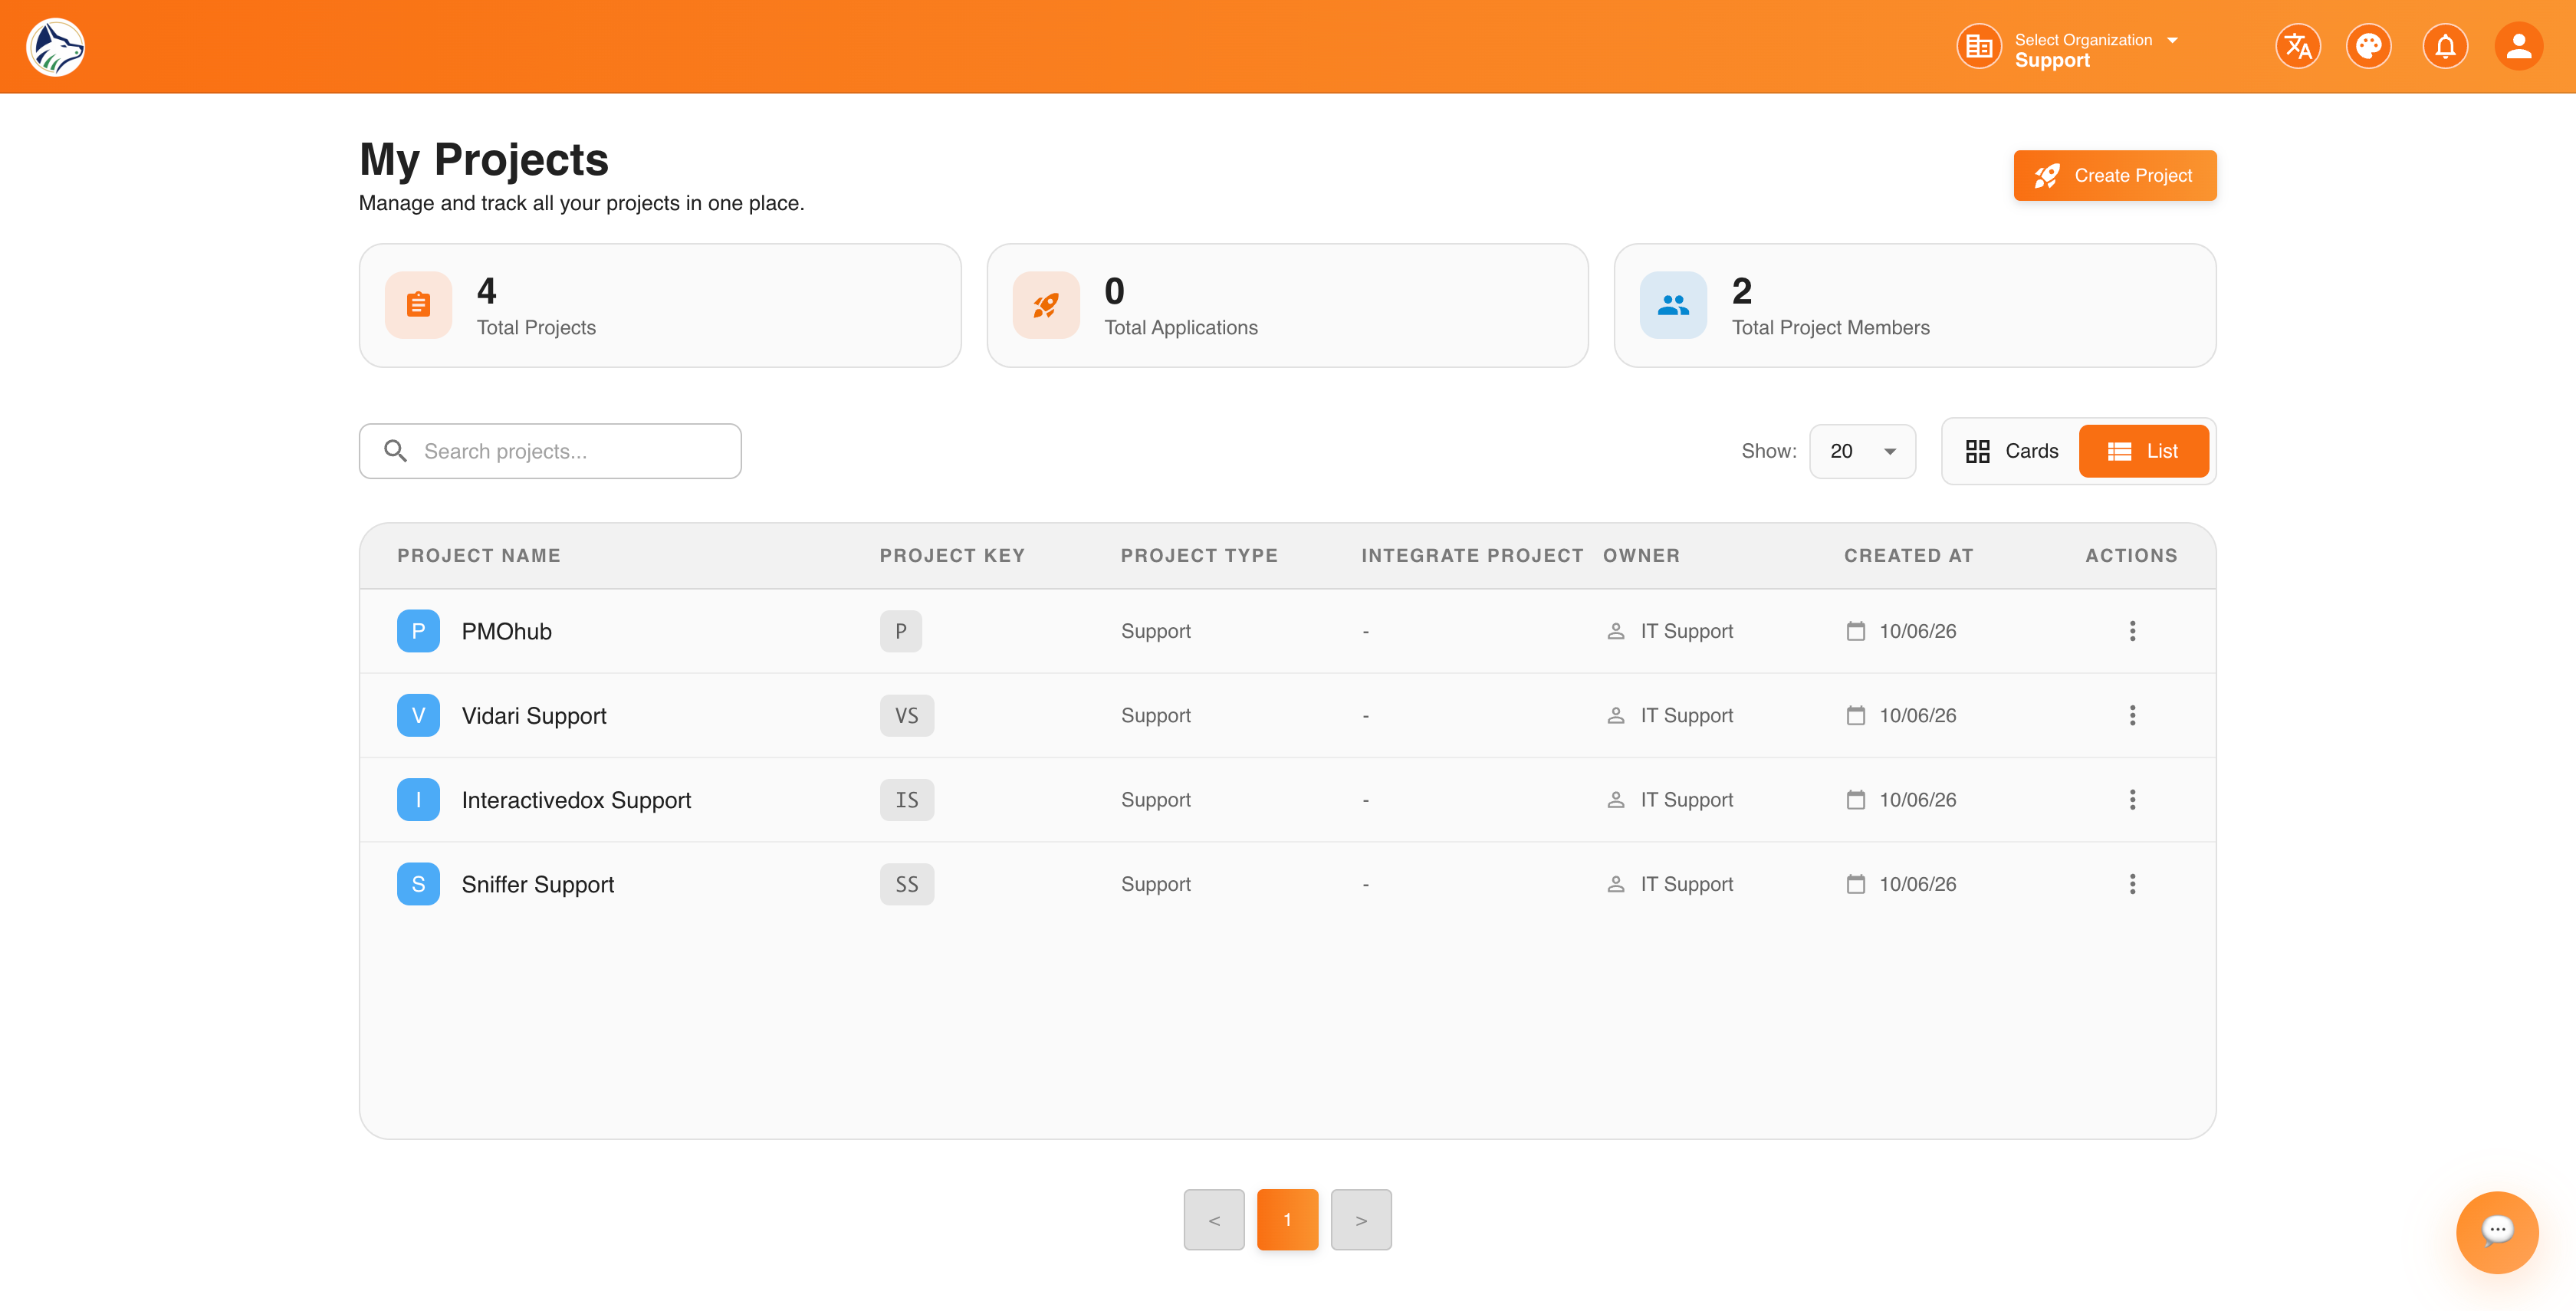
🏠 Projects Dashboard#
Your landing page after login (route: /sf/projects). Displays all projects in a card layout.
📇 Project Card Details#
Each card shows:
- Project Name and color icon
- Project Key — short identifier used in issue keys (e.g.,
SNF-101) - Team Members — avatars of assigned members
- Open Issues — count of unresolved bugs and tasks
- Last Activity — timestamp of most recent update
- 3-dot menu — Edit · Archive · Delete
📌 My Tasks#
Access My Tasks from the global sidebar to see all issues assigned to you across every project. See the dedicated 📌 My Tasks → page for details. Quick reference:
➕ Create Project Wizard#
Click Create New Project to launch the guided wizard. It’s a streamlined two-step flow — capture the essentials, then continue configuring inside the project once it’s been created.
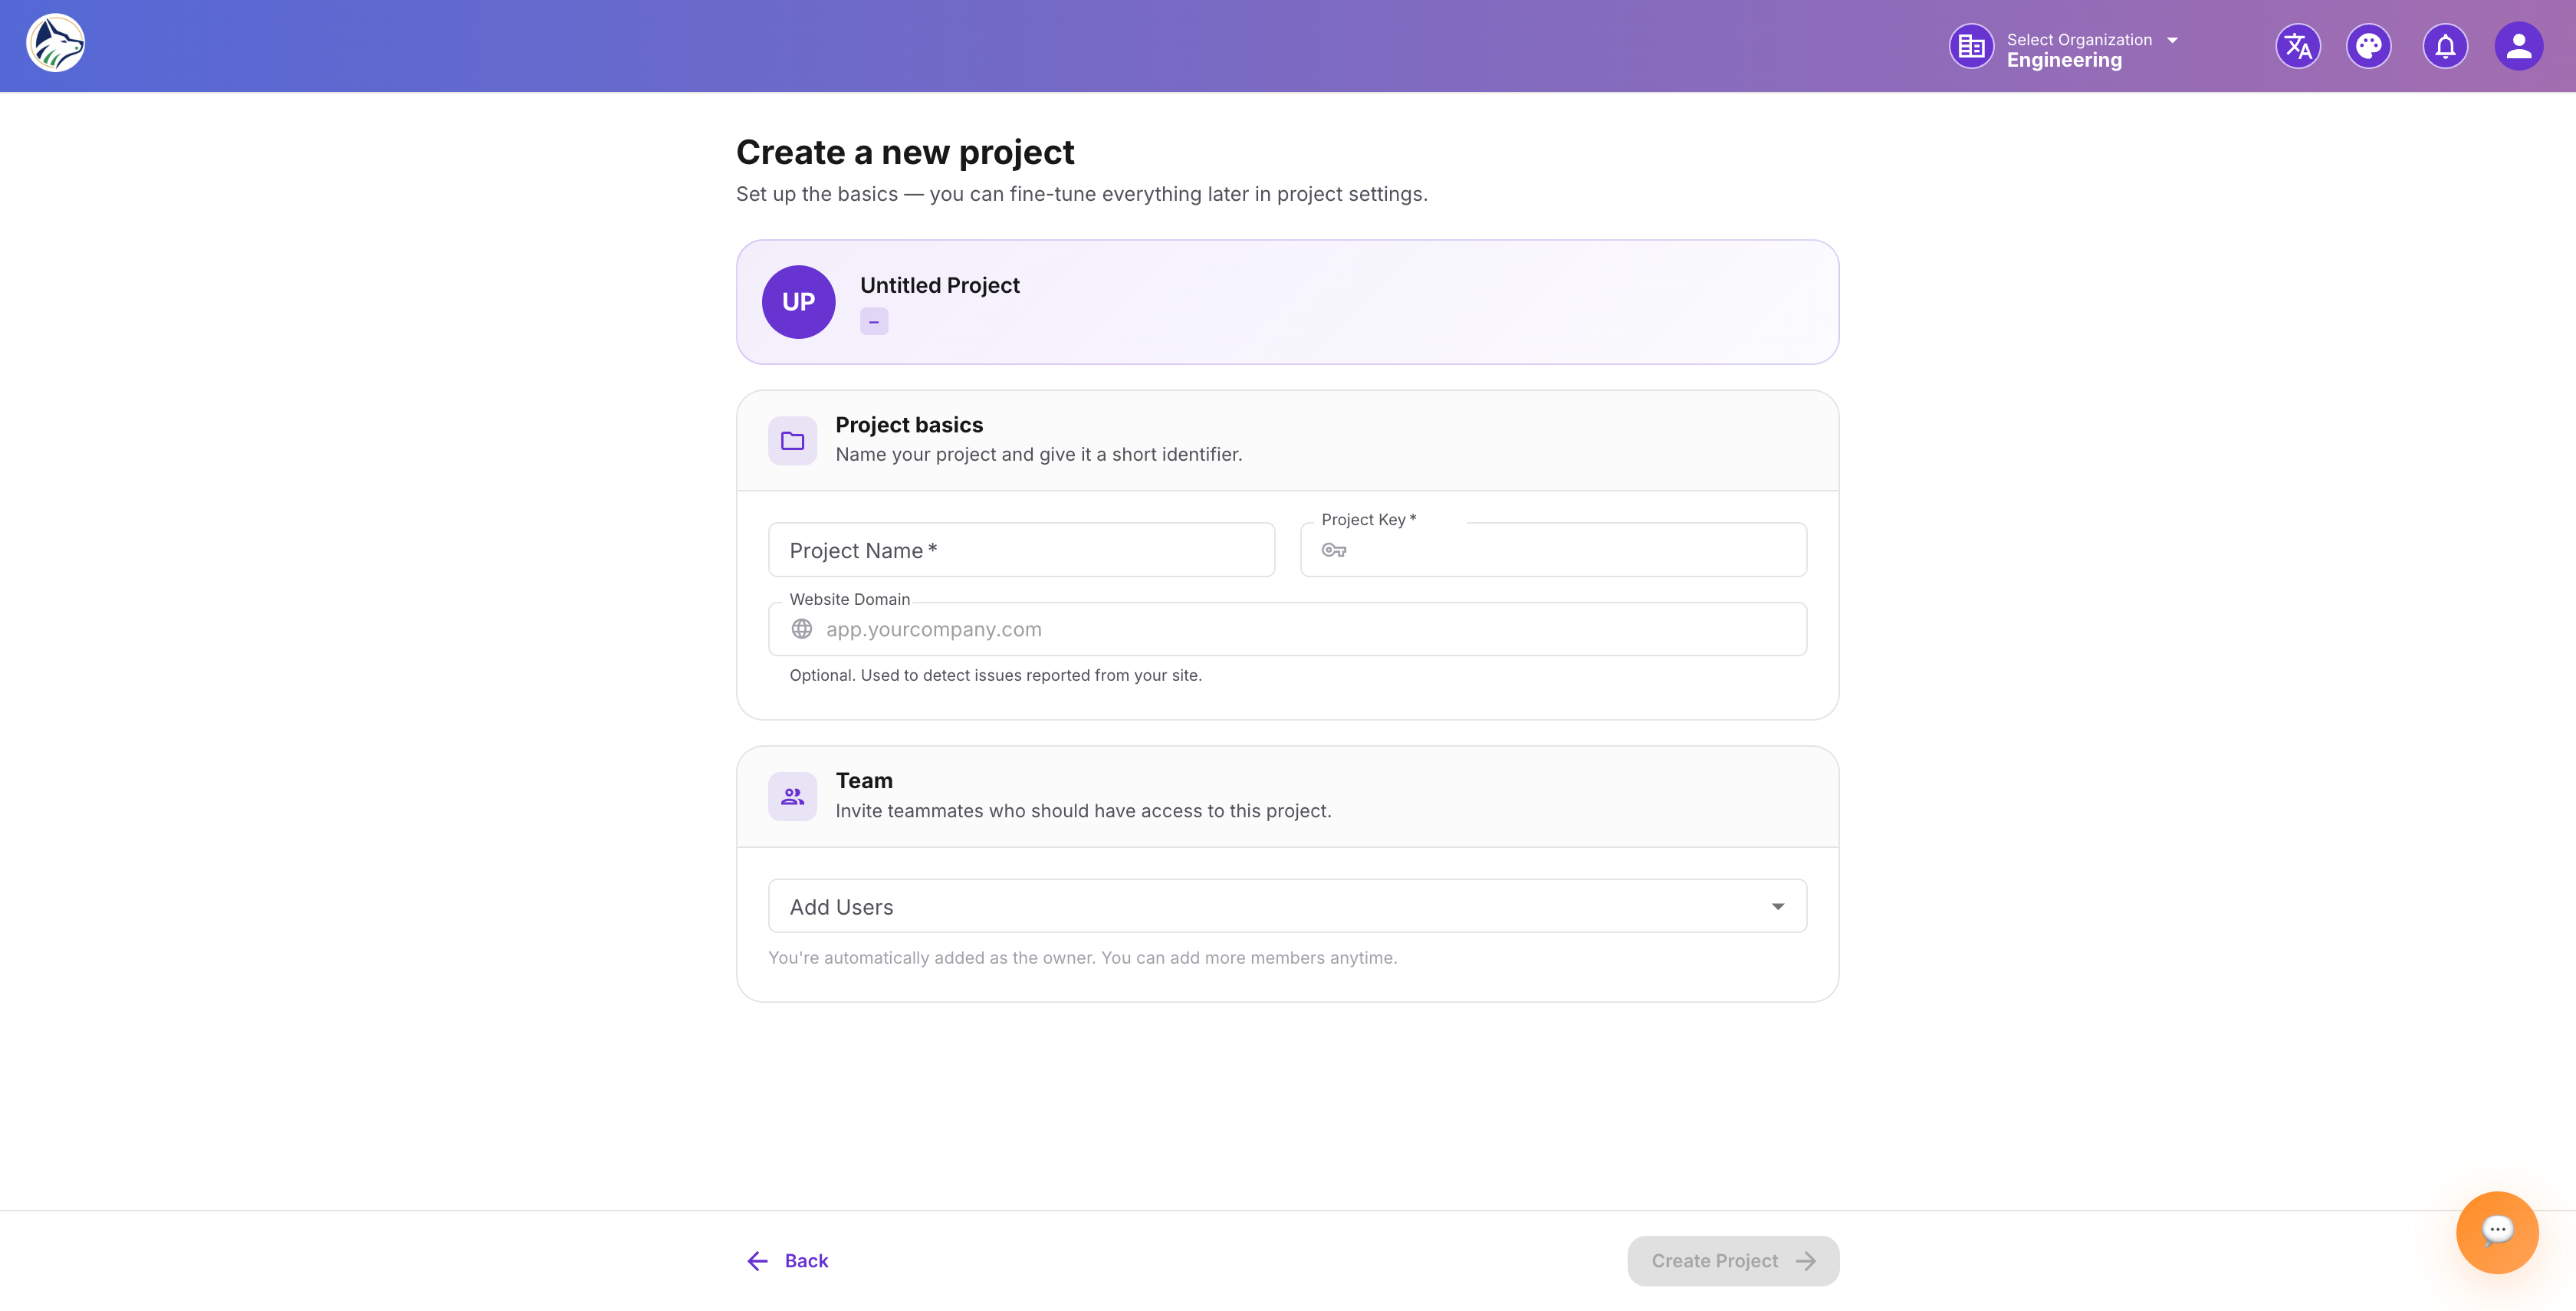
Step 1 · 📝 Project Details#
New projects are created with the feedback widget, error monitoring (Live Logs), and the Task Board all enabled out of the box.
Step 2 · ✅ Done#
The project is created and you are redirected to the new project’s 📋 Task Board. A Getting Started Checklist appears in the sidebar with the remaining setup actions you can complete at your own pace:
- Install the recording snippet on your domain
- Customize the feedback widget — categories, brand color, recording length, “Powered by Sniffer” attribution, etc. See 💬 Feedback →.
- Configure integrations such as Jira, Zendesk, Slack, or Microsoft Teams. See 🔗 Integrations →.
- Set up category routing — choose which channel each customer-submitted category (Bug Report, Feedback, Feature Request, Suggestion) flows to.
- Tune error monitoring — sync destinations, alert thresholds, and email / Slack notifications. See 📡 Live Logs →.
- Invite additional team members and assign roles. See ⚙️ Settings & Permissions →.
📱 Applications#
Each project can contain multiple Applications — sub-modules representing different parts of your product (e.g., “Web Frontend”, “API Server”, “Mobile App”, “Marketing Site”).
Navigate to Project → Applications (/sf/projects/:id/applications) to manage them.
Note: You can register multiple applications under a single project for different environments (staging, production) or multiple domains. Each application has its own data-project-id token but shares the project’s bug pipeline.
🔧 Managing Existing Projects#
✏️ Edit Settings#
Navigate to Settings from the project sidebar (/sf/projects/:id/settings) to modify project name, description, icon color, integrations, statuses, tags, members, and more. See ⚙️ Settings & Permissions →.
📦 Archive#
Deactivate a project while preserving all data. Archived projects can be restored at any time from the Archived tab on the Projects Dashboard.
🗑️ Delete#
Navigate to Settings → Danger Zone and click Delete Project.
- A confirmation dialog appears.
- Type the project name exactly to confirm.
- Click Delete to permanently remove all data.
⚠️ Warning: Deleting a project is irreversible. All tasks, feedback, attachments, and settings will be permanently removed. Existing Jira tickets created by Sniffer will remain in Jira but will no longer sync.
🔐 Permissions#
See ⚙️ Settings & Permissions → for role details.
🔗 Related Topics#
📁 Projects
Create, configure, and manage the projects that organize your defect tracking, feedback collection, and error monitoring workflows.
🌟 Overview#
A project in Sniffer is the central workspace for tracking bugs, collecting feedback, and monitoring errors. Each project has its own 📋 Task Board , 💬 Feedback pipeline , 📡 Live Logs , 🔗 Integrations , and team roster. You can create separate projects for different products, teams, or clients.
Projects are created using a guided onboarding wizard and appear on your Projects Dashboard where you can access, edit, archive, or delete them.
🏠 Projects Dashboard#
Your landing page after login (route: /sf/projects). Displays all projects in a card layout.
📇 Project Card Details#
Each card shows:
- Project Name and color icon
- Project Key — short identifier used in issue keys (e.g.,
SNF-101) - Team Members — avatars of assigned members
- Open Issues — count of unresolved bugs and tasks
- Last Activity — timestamp of most recent update
- 3-dot menu — Edit · Archive · Delete
📌 My Tasks#
Access My Tasks from the global sidebar to see all issues assigned to you across every project. See the dedicated 📌 My Tasks → page for details. Quick reference:
➕ Create Project Wizard#
Click Create New Project to launch the guided wizard. It’s a streamlined two-step flow — capture the essentials, then continue configuring inside the project once it’s been created.
Step 1 · 📝 Project Details#
New projects are created with the feedback widget, error monitoring (Live Logs), and the Task Board all enabled out of the box.
Step 2 · ✅ Done#
The project is created and you are redirected to the new project’s 📋 Task Board . A Getting Started Checklist appears in the sidebar with the remaining setup actions you can complete at your own pace:
- Install the recording snippet on your domain
- Customize the feedback widget — categories, brand color, recording length, “Powered by Sniffer” attribution, etc. See 💬 Feedback → .
- Configure integrations such as Jira, Zendesk, Slack, or Microsoft Teams. See 🔗 Integrations → .
- Set up category routing — choose which channel each customer-submitted category (Bug Report, Feedback, Feature Request, Suggestion) flows to.
- Tune error monitoring — sync destinations, alert thresholds, and email / Slack notifications. See 📡 Live Logs → .
- Invite additional team members and assign roles. See ⚙️ Settings & Permissions → .
📱 Applications#
Each project can contain multiple Applications — sub-modules representing different parts of your product (e.g., “Web Frontend”, “API Server”, “Mobile App”, “Marketing Site”).
Navigate to Project → Applications (/sf/projects/:id/applications) to manage them.
Note: You can register multiple applications under a single project for different environments (staging, production) or multiple domains. Each application has its own data-project-id token but shares the project’s bug pipeline.
🔧 Managing Existing Projects#
✏️ Edit Settings#
Navigate to Settings from the project sidebar (/sf/projects/:id/settings) to modify project name, description, icon color, integrations, statuses, tags, members, and more. See ⚙️ Settings & Permissions → .
📦 Archive#
Deactivate a project while preserving all data. Archived projects can be restored at any time from the Archived tab on the Projects Dashboard.
🗑️ Delete#
Navigate to Settings → Danger Zone and click Delete Project.
- A confirmation dialog appears.
- Type the project name exactly to confirm.
- Click Delete to permanently remove all data.
⚠️ Warning: Deleting a project is irreversible. All tasks, feedback, attachments, and settings will be permanently removed. Existing Jira tickets created by Sniffer will remain in Jira but will no longer sync.
🔐 Permissions#
See ⚙️ Settings & Permissions → for role details.